
He’s the rootinest tootinest cowboy in the wild wild west!
Mr. Woody is in the spotlight along with all his friends this weekend at the opening of Toy Story Land in Hollywood Studios! If you are a Toy Story fan like me, you’ve been counting down the days until the gates open! I have the perfect DIY for you to rock this weekend in Toy Story Land. If you know DIY’s aren’t your thing, I am personally making these for anyone on my site! I have opened a store called Cinderella’s Crafts! If you are interested in purchasing the Woody Ears, click here!

Here’s the list of items you will need:
- 1 Brown Headband
- 1/4 yard of bright yellow fabric
- 1/4 a yard of cow print fabric
- red pom pom ribbon
- red flat ribbon – about 1/4 of an inch thick
- gold glitter foam
- sheriff star print out/stencil
- pillow fluff
- red bandana or red bandana/printed fabric
- glue gun
- scissors
- yellow thread
- white thread
- small sewing needle


Step One: Cutting Your Ear Shape.
- Fold your yellow fabric in half. At the fold, cut your round ear shape. you can make it as big or small as you would like. I free handed most of the ears I make. With the yellow fabric, just cut one ear. Lay the yellow ear over the cow print and use as a stencil for the cow print. Repeat this step with the cow print fabric.


Step 2: Sewing You Ears
- I like testing out the ears on the headband before I start to sew. Sew about one inch above from the headband on the yellow and cow printed fabric. Do this on both sides. You can also use the glue gun to seal the ears if you don’t want to sew. Sew or glue until you are halfway up the ear. Leave that one inch of room at the bottom of the ear for the headband to slide through.


Step 3: Adding the Fluff
- Once you have your ears sewed/glued halfway, add ask much of the pillow fluff as you would like. I like sturdy, fluffy ears, so I added a lot of pillow fluff.

Step 4: Add the ears to the headband and seal the ears!
- Once you have stuffed the ears to your liking, seal the ears buy completing the sewing and/or gluing to the ears still leaving that one-inch space on either side of the ears on the headband. Once you have placed the ears through the headband, add more thread to the needle/or glue the openings on the ears. Make sure the ears are secure.


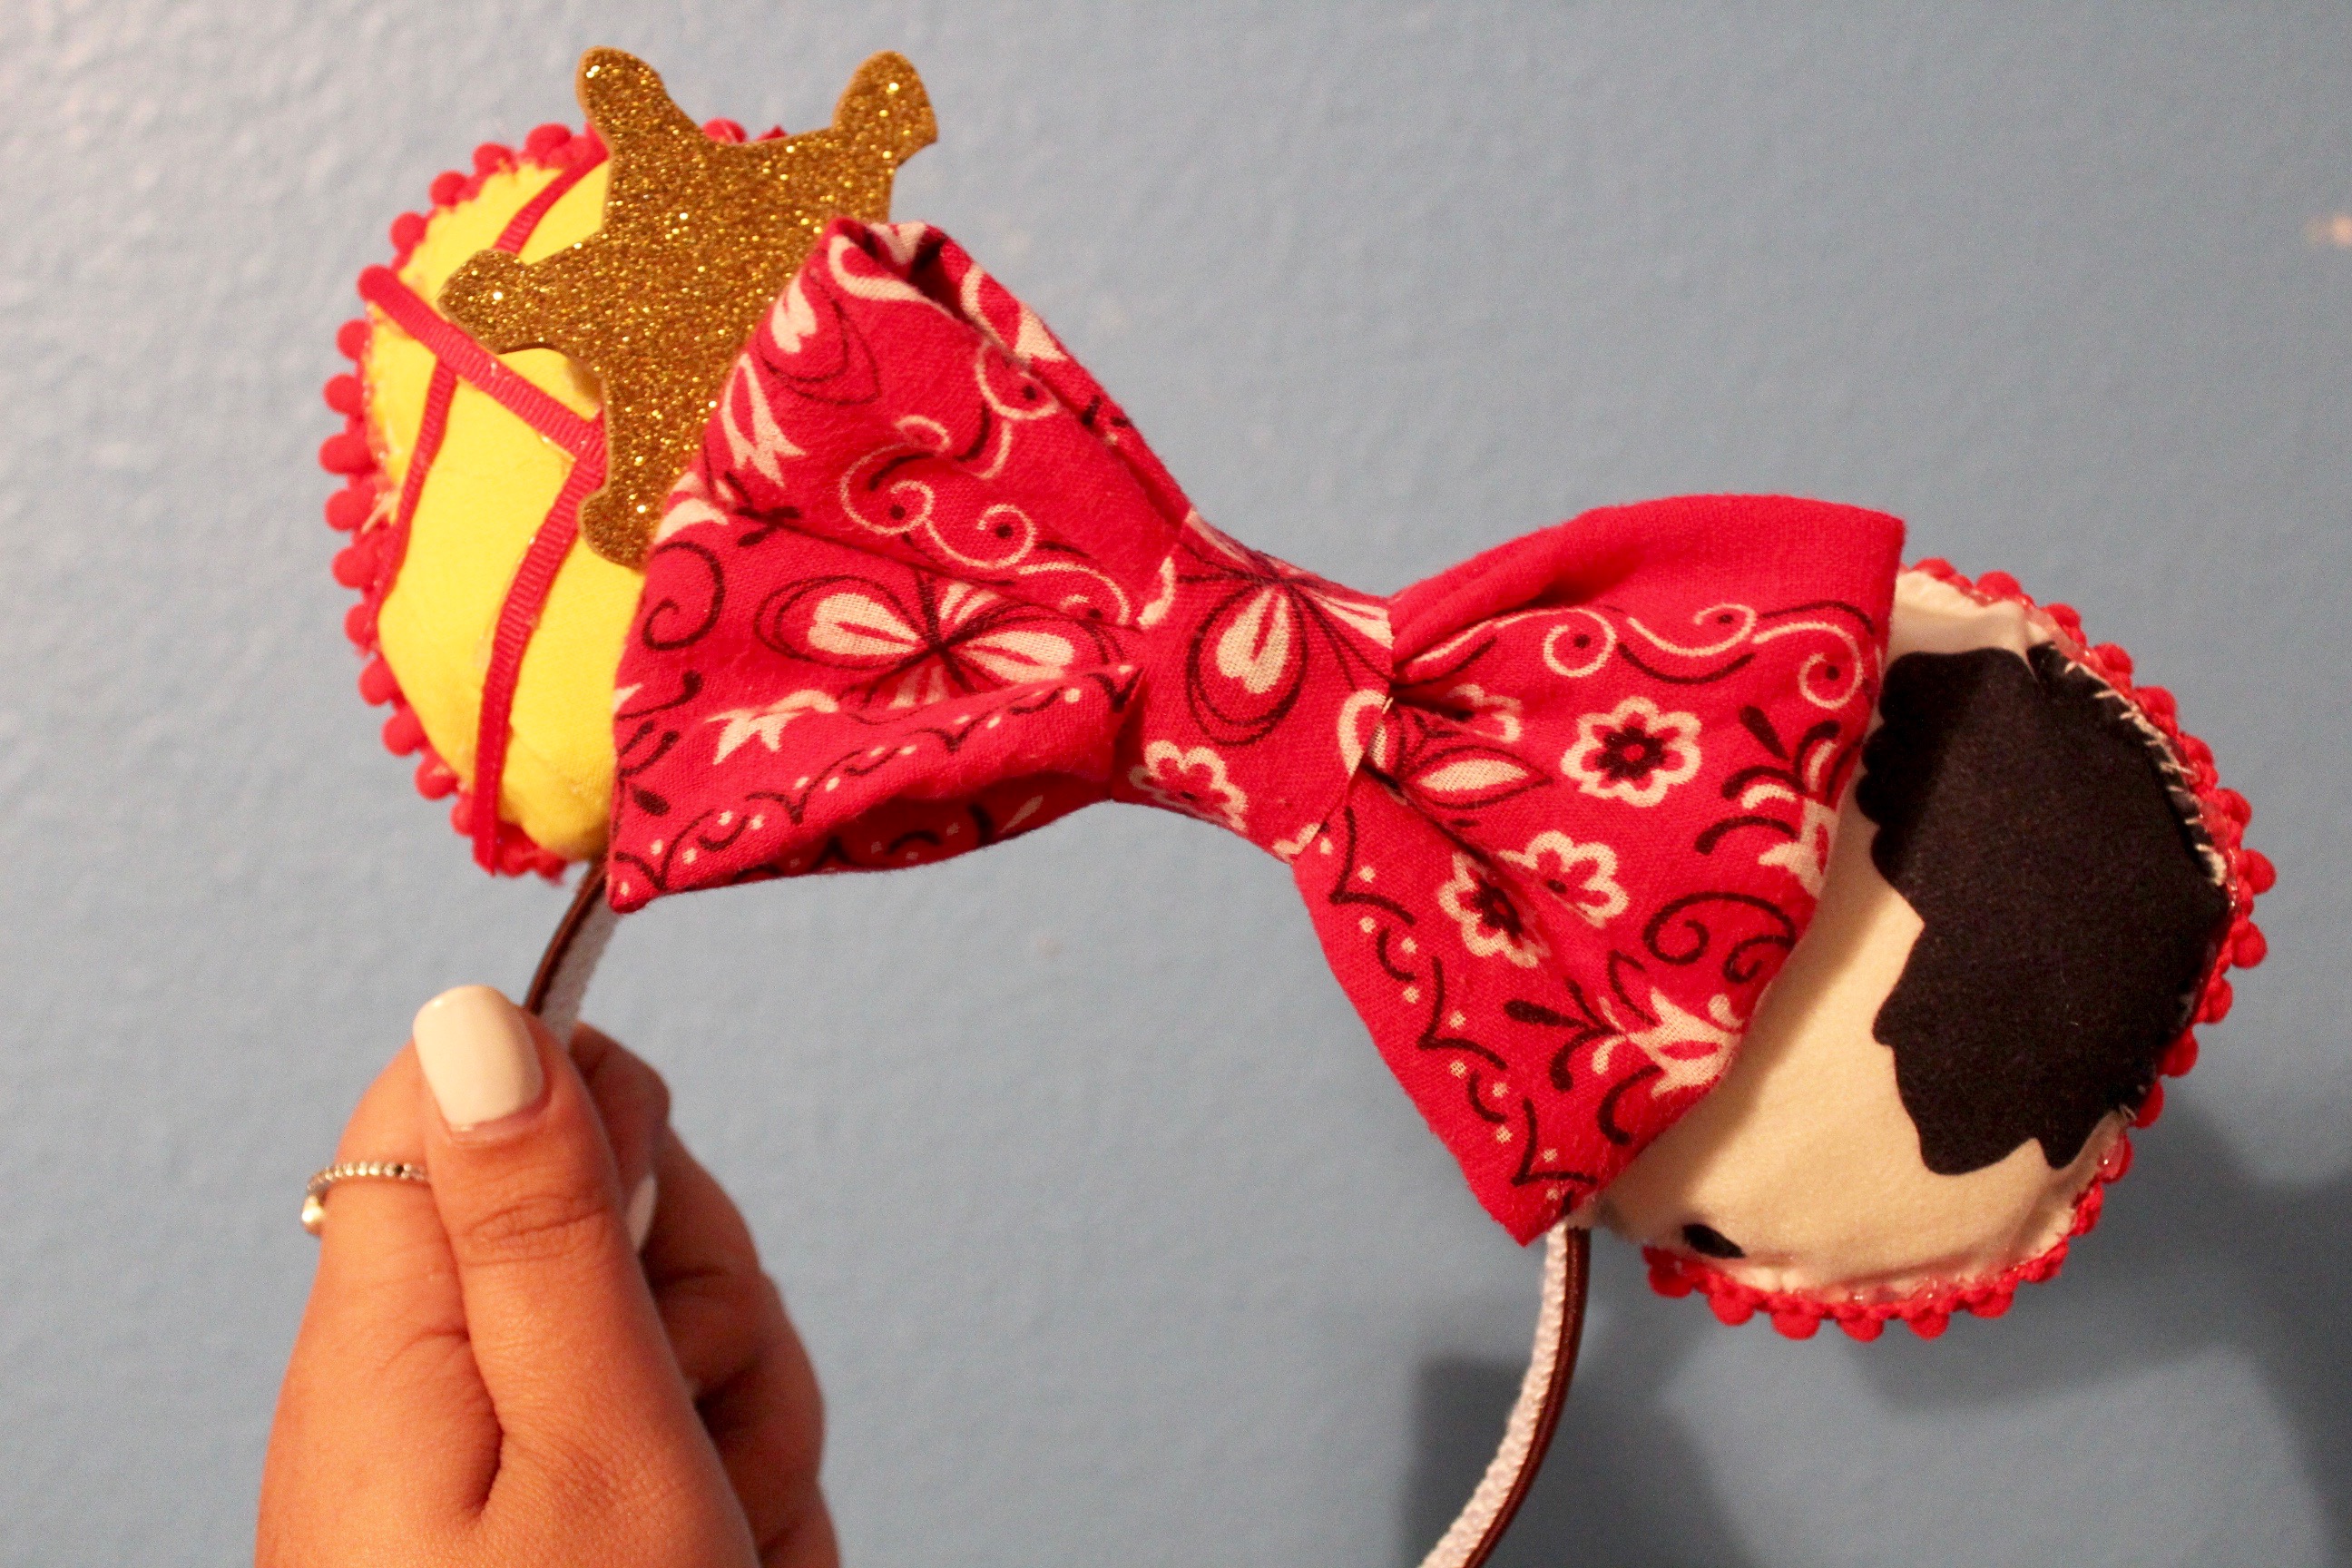
Step 5: Sheriff Star
- To create Woody’s sheriff star, I found some templates online for the star. Take the gold glitter foam and trace the sheriff star on it. Cut it out and save to the side.


Step 6: Ribbon on the Ears!
- Once you have your ears on the headband and they are secure and spaced out to your liking, add the pom pom ribbon around both ears. Use the glue gun for this step.

Step 7: Woody’s Plaid Shirt
- On the yellow side of the ear is where the flat red ribbon will go. Make you plaid, checkered pattern by cutting small strips of red on the yellow ear. Secure by gluing them down. this can be as spaced out or as small as you would like. Add the sheriff star from Step 5 on top with the glue gun.


Step 8: Woody’s Bandana Bow
- Create a bow from the bandana by using the glue gun. Cut a 5 by 5-inch square, fold in half and glue down. Scrunch the middle together and tie an additional piece of fabric in the middle of the bow to secure. Glue the bow in the middle of the headband between the cow and yellow plaid ears.


That is the final DIY! You have now created Woody Ears! This is my process on how I make my Woody Ears. I am officially selling these! If you would like a pair, I am selling them through my website! Click here to purchase my Woody Ears! They are super fun and perfect for the new Toy Story Land!

Click here to see my last Disney Outfit Of The Day! Get ready for another Disney Blog where I show you my Outfits in Toy Story Land. Make sure you follow for updates!
Until the next blog,
Cheyenne Lenore
Instagram|Twitter|Facebook|Youtube|Poshmark|
Leave a Reply